Happy Seedlings
March 4, 2011
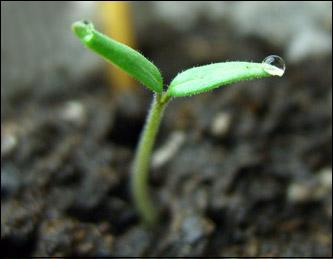
As our planting season gets underway, there’s always the question of how best to prepare those wee little seedlings for the big wide world. And there are as many theories about how best to do that, as there are gardeners and farmers fussing over seeds. I have tried a few methods, many of which I didn’t like because they didn’t work for me. Not that they were stingy, per se, but because they were a poor match for my particular growing conditions. A few I’ve either tried or seen other folks use, which did work for me and/or for them, have subsequently been used year after year with good results. I thought now would be a good time to share some of those lessons.
First, in the category of “stuff that doesn’t work”, the top of the list was my Great Tomato Experiment from a number of years ago. I wanted to get a head start on my largest planting yet of tomatoes - 400 plants. Since I didn’t have access to a greenhouse or even a hotframe at that time, I converted my office into a mini-seedling room. I put up lights and set up tables to house all 400 of those little plants. I also didn’t want to mess around with transplanting them, so I potted everything up in those small formed peat pots, which can go directly into the soil. It was a beautiful thing to behold, row after row of those little cups, each holding a small tomato seed. More precisely, it was a beautiful sight until things started to go wrong.
First thing to go wrong was the watering. How exactly do you water four hundred plants carefully in a room of your home, without accidentally spraying the walls or spilling on the floor? I had not yet learned about drip irrigation at that point, and suffice to say I got both the walls and floor wet despite being very careful. Oh, and wet hardwood flooring gets slippery so there were a few close-calls there too. But I figured out how to water everyone. Next problem was a direct result of my planting medium. Peat pots must be kept perfectly moist - too wet and they start to disintegrate, too dry and the seedling dries out. Again despite being very careful, the pots on the outside of each drainage tray tended to dry out while the inside pots tended to stay wet. It was very difficult to maintain that perfect moisture. Which led to the third problem - damping off disease. Those interior pots stayed much too wet, and most of those seedlings succumbed to damping off disease right on schedule, after the emergence of the cotyledons. That single issue killed off half my planting. But we weren’t done yet. My ongoing irrigation issues had the bottoms standing in water at least part of the day, and the soil surface in each pot had to be kept moist, so after awhile I developed a cottony cover of fungus on top of the pots, and had a very nice crop of fungus gnats show up as well. The seedlings which had survived the first wave of damping off disease were weakened by the poor moisture conditions, and many simply gave up the battle, failing to thrive or showing marked growing problems. And they weren’t even outside yet! I think by the time our weather had warmed up that spring, I had only a few dozen plants of the original 400 seedlings. It was very discouraging.
Since then I have experimented with a lot of methods, and arrived at the following: 1) the plastic seedling trays are sometimes a pain but they are still the best option for starting anything that doesn’t absolutely thrive in the cool spring conditions. Even cool-season plants like lettuce and chard enjoy a good strong start in seedling trays. I have used the 72-cell trays for a long time but I’m warming up to the micro-cell 310 and 396 trays for everything but the largest seeds. Those trays lend themselves very nicely to transplanting later. I just wish they had liner trays that fit underneath.
2) Watering is a major issue. I have learned to water from the bottoms up, instead of from the soil surface down. That has dramatically reduced the incidence of damping off, fungus carpets and fungus gnats.
3) Ventilation is also a major issue. Keep that air moving, and keep that humidity down. Still, damp air is a virtual party zone for most of the disease issues that strike seedlings. Even if it feels chilly to us, gently moving air is the best environment for seedlings. Not only does it reduce moisture-related diseases but it also builds structurally stronger plants.
4) The air temps can be quite cool if the seedlings have bottom heat from any source. I have experimented with heating mats, heated water baths (with the actual soil separate from, but warmed by, the water), and radiant pipe. I next want to experiment with traditional hot frames formed by composting animal manure, but I haven’t gotten that far yet. Nevertheless, it’s far better to heat the root zone and let the air stay cool, than the other way around. Providing warm air and cool root zones will set back your germination speed and success rate by a large margin. Sometimes so large that you miss your planting window.
5) Light is only important after you’ve got seedling emergence. But once you get that emergence, give them as much light as you can afford - either lots of strong outside daylight, such as in a hoophouse or greenhouse, or bring them light in the form of high intensity discharge lights (HID) such as metal halide bulbs. I’m not sold yet on LED lighting but some folks are. Experiment. However, please be advised that the more familiar 4’ tube fluorescents often don’t provide enough light unless they are almost touching the seedlings. They can be costly too, in terms of amount of light per watt. The HID’s cost more to buy but they provide more light at lower cost.
6) The quality of the soil also makes a difference, but is a large topic in and of itself. Right now my farming partner and I are using a pre-made commercial potting mix that we buy in by the compressed bale. To that mix, we add a mixture of both fast-release and slow-release organic fertilizing materials, blended into what we call “pixie dust”. Whatever blend you use, spend some time looking at how well that soil matches your seedling needs, and amend it if/as needed. And more fertility is not necessarily better! Some seedlings do extremely well starting off with relatively low fertility levels. Research and experiment, for a personalized combo that can get your seedlings off to a good strong start.
It’s so exciting to see row after row of those happy little seedlings, each reaching for fresh air and light. We do our best to make sure the parent plants are happy and healthy while producing those seeds. We also need to provide seedlings with their Goldilocks conditions - not too wet, not too dry, not too warm or cold, not too rich or lean - but conditions that are Just Right. If we do that, they almost burst out of the ground and are off to an excellent start.


Our Successful Farming and Ranching Books

We released our very first self-published book. The Chicken Coop Manual in 2014. It is a full color guide to conventional and alternative poultry housing options, including 8 conventional stud construction plans, 12 alternative housing methods, and almost 20 different design features. This book is available on Amazon.com and as a PDF download. Please visit The Chicken Coop Manual page for more information.

Rabbit Colonies: Lessons Learned
We started with rabbits in 2002, and we've been experimenting with colony management ever since. Fast forward to 2017, when I decided to write another book, this time about colony management. The book is chock-full of practical information, and is available from both Amazon and as a PDF download. Please visit the Rabbit Colonies page for more information.
The Pastured Pig Handbook
We are currently working on our next self-published book: The Pastured Pig Handbook. This particular book addresses a profitable, popular and successful hog management approach which sadly is not yet well documented. Our handbook, will cover all the various issues involved with pastured hog management, including case studies of numerous current pastured pig operations. If you have any questions about this book, please Contact Us.

Weblog Archives
We published a farm blog between January 2011 and April 2012. We reluctantly ceased writing them due to time constraints, and we hope to begin writing them again someday. In the meantime, we offer a Weblog Archive so that readers can access past blog articles at any time.
If and when we return to writing blogs, we'll post that news here. Until then, happy reading!